How to make a PNG transparent with GIMP
1. Open the image in GIMP.
2. Select the area you want to make transparent:
Select the appropriate selection tool from the Tool window or the Tools – Selection Tools menu on the Layer window. I usually use the magic wand/fuzzy select (Select contiguous region) tool or the Select regions by color tool.
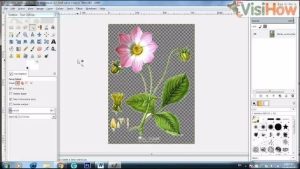
Click in the region you want to be selected. Use shift-click to add more regions/colors. Tip: It’s easier if you zoom in (View – Zoom menu) to see finer details of exactly what you’re selecting.
3. In the Layer window (the one showing your image), select Layer – Transparency – Add Alpha Channel. If this is blanked out then it’s already done. This makes sure your image can store transparency data.
4. Select Edit – Clear. This makes the selection transparent.
5. Save the file. Note: If you save it as a PNG file, be sure to select the ‘Save colour values from transparent pixels’ option in the Save as PNG dialog box.
Reference
https://thomas-cokelaer.info/blog/2016/09/gimp-how-to-make-a-transparent-background/